This Bell Pepper Sandwich is a fantastic, low-carb alternative to traditional sandwiches. Swapping out bread for crisp bell peppers adds a refreshing crunch and a burst of flavor, making it a perfect option for a healthy and satisfying meal.
Ingredients
- 2 large bell peppers (any color), halved and seeds removed
- 4 slices deli turkey or chicken breast
- 2 slices cheddar or provolone cheese
- 4 slices crispy bacon
- 4 slices tomato
- 1/4 cup avocado, mashed
- 1/4 cup mayonnaise or hummus
- Handful of fresh spinach or lettuce
- Salt and pepper, to taste
Directions
Prepare the Bell Peppers
- Slice the bell peppers in half lengthwise and remove the seeds and membranes.
Assemble the Sandwich
- Spread the mashed avocado on one bell pepper half.
- Spread mayonnaise or hummus on the other half.
- Layer the deli turkey or chicken, cheese, bacon, tomato slices, and fresh spinach or lettuce on one of the bell pepper halves.
- Season with salt and pepper to taste.
Close the Sandwich
- Top with the other bell pepper half to create a sandwich.
Serve
- Cut in half for easier eating, and enjoy your crunchy, flavorful sandwich!
Servings and Timing
- Servings: 2
- Prep Time: 10 minutes
- Total Time: 10 minutes
Variations
- Different Fillings: Swap out the deli meat for roast beef, ham, or a veggie option with grilled mushrooms.
- Cheese Choices: Use your favorite cheese like Swiss, gouda, or feta for a different flavor.
- Add More Veggies: Incorporate sliced cucumbers, olives, or bell peppers for added crunch.
Storage and Reheating
- Storage: This sandwich is best enjoyed fresh but can be stored in the refrigerator for up to 1 day.
- Reheating: Reheat in a toaster oven or regular oven to maintain the crispness of the bell peppers, but the bacon may lose its crispiness.
10 FAQs
- Can I use any type of bell pepper?
Yes, any color bell pepper works—red, yellow, green, or orange. - What if I don’t like avocado?
You can substitute it with cream cheese or a spread of your choice. - Can I make this sandwich ahead of time?
It’s best enjoyed fresh, but you can prepare the components in advance and assemble just before eating. - Is this sandwich suitable for a picnic?
Yes, it’s a great option for a picnic as long as it’s kept cool until serving. - Can I use pre-cooked bacon?
Yes, pre-cooked bacon can be used for convenience. - How can I make this sandwich vegetarian?
Replace the meat with extra cheese, avocado, and additional veggies like roasted peppers or mushrooms. - What can I serve with this sandwich?
A side of fresh fruit or a light salad complements this sandwich well. - Can I use a different spread instead of mayonnaise or hummus?
Yes, try mustard, tzatziki, or a light vinaigrette for a different flavor. - How do I make it spicier?
Add sliced jalapeños or a spicy sauce to kick up the heat. - Can I grill the bell peppers?
Yes, grilling the bell peppers can add a smoky flavor. Just be sure to cool them before assembling the sandwich.
Conclusion
The Bell Pepper Sandwich is a refreshing and healthy alternative to traditional sandwiches. With its crunchy bell pepper “bread” and flavorful fillings, it’s perfect for a quick lunch or a light dinner. Enjoy customizing it to your taste and savor the burst of flavors in every bite!
Print
Garlic Shrimp Pasta
- Total Time: 30 minutes
Description
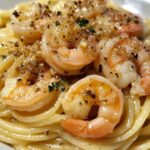
Indulge in this quick and delicious Garlic Shrimp Pasta, featuring succulent shrimp tossed in a rich garlic butter sauce, with a hint of lemon and red pepper for a kick. Perfect for a weeknight dinner!
Ingredients
Scale
- 8 oz spaghetti or linguine
- 1 lb large shrimp, peeled and deveined
- 4 tbsp unsalted butter
- 4 cloves garlic, minced
- 1/2 tsp red pepper flakes (optional)
- 1/2 cup dry white wine or chicken broth
- 1 lemon, juiced and zested
- 1/4 cup fresh parsley, chopped
- Salt and pepper to taste
- Grated Parmesan cheese for serving
Instructions
- Cook the Pasta:
Bring a large pot of salted water to a boil. Add the pasta and cook according to package instructions until al dente. Drain the pasta, reserving 1/2 cup of the pasta water, and set aside. - Cook the Shrimp:
While the pasta is cooking, heat 2 tablespoons of butter in a large skillet over medium-high heat. Add the shrimp in a single layer. Season with salt, pepper, and red pepper flakes if using. Cook for 2-3 minutes on each side, or until the shrimp are pink and opaque. Remove the shrimp and set aside. - Make the Garlic Butter Sauce:
In the same skillet, add the remaining 2 tablespoons of butter. Once melted, add the minced garlic and sauté for 1-2 minutes until fragrant. Pour in the white wine or chicken broth, and bring to a simmer, scraping up any browned bits. Cook for 3-4 minutes until slightly reduced. - Combine Everything:
Return the shrimp to the skillet, along with the lemon juice, lemon zest, and chopped parsley. Toss to coat the shrimp in the sauce. Add the cooked pasta and toss everything together. If the sauce is too thick, add a bit of the reserved pasta water until you reach your desired consistency. - Finish and Serve:
Remove from heat and serve the pasta hot, garnished with extra parsley and grated Parmesan cheese.
Notes
- For extra flavor, consider marinating the shrimp in lemon juice and garlic for 15 minutes before cooking.
- You can substitute zucchini noodles for pasta for a lower-carb option.
- Prep Time: 10 minutes
- Cook Time: 20 minutes
