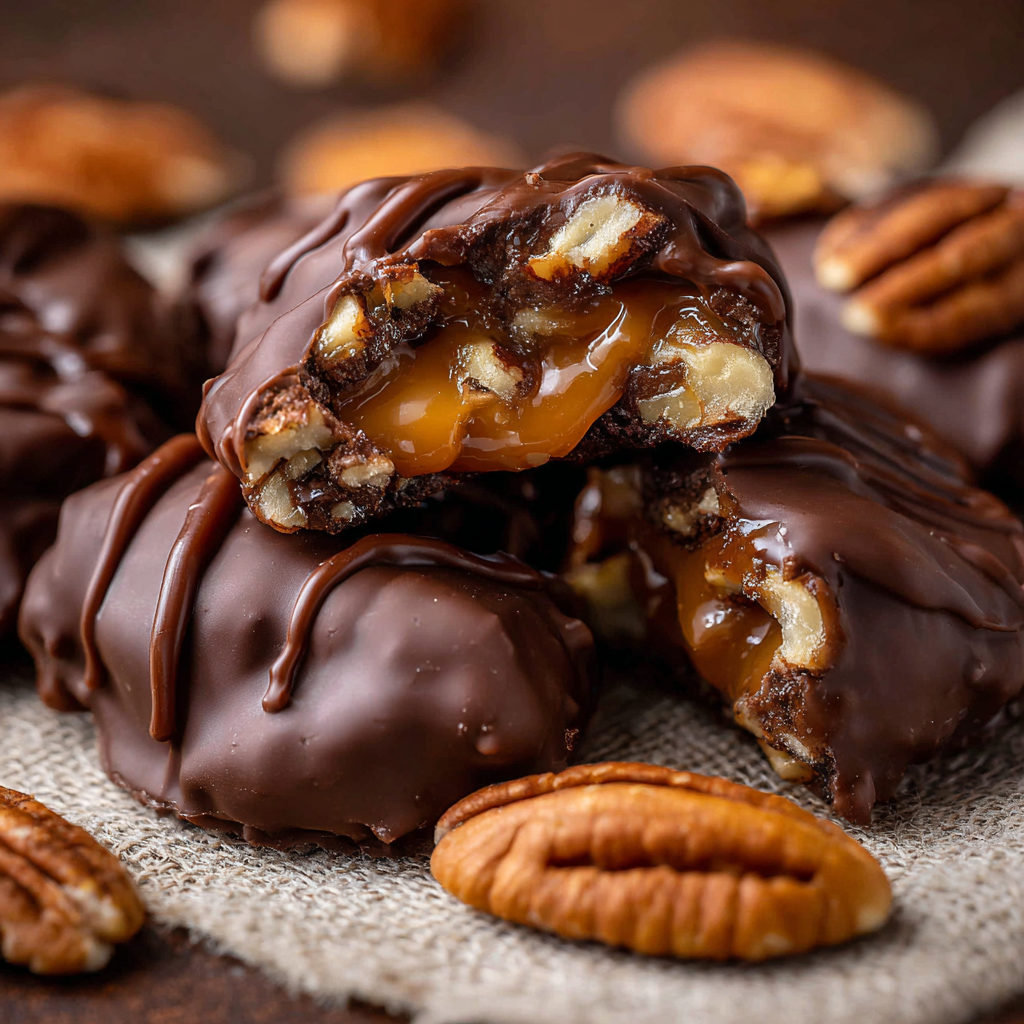
If you have a sweet tooth and love the perfect combination of chocolate, caramel, and crunchy nuts, this Homemade Chocolate Turtles recipe is an absolute must-try. These delightful treats bring together rich, gooey caramel with smooth chocolate and toasted nuts in one bite-sized candy that’s both satisfying and unforgettable. Whether you’re making them for a special occasion or just a cozy night in, these Homemade Chocolate Turtles deliver a homemade touch with every sweet, nutty bite.
Why You’ll Love This Recipe
- Classic flavor fusion: The irresistible mix of caramel, chocolate, and nuts creates a timeless treat that never disappoints.
- Easy to customize: You can adjust the nuts, chocolate type, or caramel texture to suit your personal taste perfectly.
- Perfect for gifting: These candies make thoughtful, handmade gifts that feel personal and delicious.
- Great for any occasion: Whether it’s holidays, birthdays, or just because, Homemade Chocolate Turtles fit right in.
- Satisfies sweet cravings: Each bite delivers a perfect balance of sweet and salty that’s deeply comforting.
Ingredients You’ll Need
Keeping it simple is key to truly enjoying the flavors in Homemade Chocolate Turtles. Each ingredient contributes to the rich taste and wonderful texture, making these treats incredible with minimal fuss.
- High-quality chocolate: Use semisweet or milk chocolate for the smooth, creamy coating that melts in your mouth.
- Soft caramel: Opt for soft caramel squares or homemade caramel to achieve that gooey center.
- Assorted nuts: Pecans are classic, adding crunch and a buttery flavor, but you can also experiment with walnuts or almonds.
- Butter: Helps the caramel stay soft and adds richness.
- Sweetened condensed milk: Optional for homemade caramel variations to enhance creaminess and sweetness.
Variations for Homemade Chocolate Turtles
One of the best parts about Homemade Chocolate Turtles is how versatile they are. Feel free to explore these variations to make the recipe uniquely yours or adapt for special diets and flavor preferences.
- Nut-free option: Use toasted sunflower seeds or pretzel pieces for a crunchy alternative without nuts.
- Dark chocolate twist: Swap milk chocolate for dark chocolate to add a deeper, more intense flavor.
- Sea salt sprinkle: Add a pinch of flaky sea salt on top after dipping for a sweet-salty contrast.
- Spiced caramel: Stir in cinnamon or chili powder into the caramel for a bold twist.
- Mini turtles: Make smaller, bite-sized versions for parties or easy snacking.

How to Make Homemade Chocolate Turtles
Step 1: Prepare the Nuts
Start by toasting your pecans or chosen nuts in a dry skillet over medium heat for about 5 minutes, shaking the pan frequently to avoid burning. Toasting enhances their flavor and gives those classic nutty notes that make Homemade Chocolate Turtles so much better.
Step 2: Arrange the Nuts on Parchment Paper
On a baking sheet lined with parchment paper, arrange small clusters of the toasted nuts in loose groups. These clusters will form the base of each turtle, so keep them bite-sized and fairly even for best results.
Step 3: Add the Caramel
Place a caramel square on top of each nut cluster. If using homemade caramel, scoop a small dollop over each cluster instead. This gooey caramel will bind the nuts together and become the luscious center of your treat.
Step 4: Melt the Chocolate
In a microwave-safe bowl or using a double boiler, gently melt your chocolate until smooth and glossy. Be careful not to overheat — stirring frequently helps achieve a perfect melt without seizing the chocolate.
Step 5: Coat the Turtles
Spoon the melted chocolate over each caramel and nut cluster, covering them completely. You can use the back of the spoon to spread the chocolate evenly, creating that beautiful turtle shape that’s iconic to this treat.
Step 6: Chill and Set
Transfer the baking sheet to the refrigerator and let the Homemade Chocolate Turtles set for at least an hour. This step is crucial for the chocolate to harden and the caramel to firm up slightly while staying delightfully chewy.
Pro Tips for Making Homemade Chocolate Turtles
- Use room temperature ingredients: This helps the caramel and chocolate combine more smoothly for better texture.
- Choose quality chocolate: A higher cocoa percentage means richer flavor and better melting consistency.
- Work quickly: Once caramel is placed on nuts, coat with chocolate before caramel gets too cool to maintain a smooth finish.
- Line your trays with parchment: Prevents sticking and makes it easy to remove the turtles once set.
- Store properly: Keep your treats in an airtight container to maintain freshness and softness.
How to Serve Homemade Chocolate Turtles
Garnishes
Add a sprinkle of flaky sea salt or a light dusting of cocoa powder over the set turtles to enhance their flavor and presentation. A touch of these finishing touches can elevate the taste and create irresistible appeal.
Side Dishes
Serve Homemade Chocolate Turtles alongside a hot cup of coffee or creamy milk for a perfectly balanced snack. They also pair wonderfully with vanilla ice cream or fresh berries for a delightful dessert experience.
Creative Ways to Present
Package your Homemade Chocolate Turtles in decorated gift boxes or clear jars tied with festive ribbons for beautiful edible gifts. Alternatively, create a dessert platter with assorted nuts and chocolates alongside your turtles for a stunning seasonal display.
Make Ahead and Storage
Storing Leftovers
Keep any leftover Homemade Chocolate Turtles in an airtight container at room temperature for up to a week or in the refrigerator for longer freshness, depending on your climate. This helps maintain the perfect caramel softness and chocolate snap.
Freezing
Wrap your candies individually in wax paper and place them in a freezer-safe container to freeze for up to three months. Thaw in the fridge before serving to enjoy their full flavor and texture without condensation damage.
Reheating
If your turtles have been chilled too long and the caramel becomes too firm, gently warm them at room temperature or pop them in a low-temperature oven for a few minutes to soften without melting the chocolate entirely.
FAQs
Can I use different types of nuts for Homemade Chocolate Turtles?
Absolutely! While pecans are traditional, walnuts, almonds, or even hazelnuts make delicious alternatives depending on your preference or what you have available.
Is it possible to make Homemade Chocolate Turtles without caramel?
Caramel is the signature element of turtles, but if you want a twist, try using dulce de leche or peanut butter for the center; however, it changes the classic flavor profile.
How should I store Homemade Chocolate Turtles during warm weather?
Keep them refrigerated to prevent the chocolate from melting, and remove them about 15 minutes before serving to bring back a soft texture.
Can I make these turtles vegan or dairy-free?
Yes, by using dairy-free chocolate and substituting caramel with vegan caramel or homemade coconut caramel, you can enjoy a vegan version of this treat.
How long do Homemade Chocolate Turtles last?
Stored well in an airtight container, they last up to two weeks at room temperature or longer if refrigerated, maintaining their flavor and texture.
Final Thoughts
Homemade Chocolate Turtles bring a warm, comforting sweetness that’s perfect for sharing with friends and family or treating yourself. With simple ingredients and easy steps, this recipe invites you to enjoy a little homemade magic in every gooey, nutty bite. Give it a try — your taste buds will thank you!
Related Posts
Print
Homemade Chocolate Turtles
- Total Time: 1 hour 20 minutes
- Yield: 24 pieces 1x
- Diet: Gluten Free
Description
Homemade Chocolate Turtles combine rich, gooey caramel with smooth chocolate and toasted nuts to create a classic, bite-sized candy that’s perfect for gifting, snacking, or special occasions. This easy-to-make treat delivers a perfect balance of sweet and salty flavors with a satisfying crunchy and chewy texture.
Ingredients
Chocolate
- 8 oz semisweet or milk chocolate, chopped or chips
Caramel
- 12 soft caramel squares or equivalent homemade caramel
- 2 tbsp butter (optional, to keep caramel soft)
- 2 tbsp sweetened condensed milk (optional, for homemade caramel creaminess)
Nuts
- 1 cup pecans (toasted) or choice of walnuts or almonds
Instructions
- Prepare the Nuts: Toast pecans or your choice of nuts in a dry skillet over medium heat for about 5 minutes, shaking frequently to avoid burning and to enhance their flavor.
- Arrange the Nuts on Parchment Paper: Line a baking sheet with parchment paper and place small clusters of the toasted nuts in loose, bite-sized groups evenly spaced on the sheet.
- Add the Caramel: Place one soft caramel square or a dollop of homemade caramel on each nut cluster, which will bind the nuts and form the gooey center.
- Melt the Chocolate: Gently melt the chocolate in a microwave-safe bowl or double boiler, stirring frequently to ensure smooth and glossy chocolate without overheating or seizing.
- Coat the Turtles: Spoon the melted chocolate over each caramel and nut cluster, covering them completely and using the back of the spoon to shape them into classic turtle shapes.
- Chill and Set: Place the baking sheet in the refrigerator and allow the turtles to set for at least one hour until the chocolate hardens and the caramel firms up but remains chewy.
Notes
- Use room temperature ingredients for smoother caramel and chocolate combination.
- Choose high-quality chocolate with a higher cocoa percentage for better flavor and melting.
- Work quickly after placing caramel to coat with chocolate before caramel cools.
- Line trays with parchment paper to prevent sticking and ease removal.
- Store in an airtight container to maintain freshness and softness.
- Prep Time: 10 minutes
- Cook Time: 10 minutes
- Category: Appetizers
- Method: No-Bake
- Cuisine: American
Nutrition
- Serving Size: 1 piece
- Calories: 120
- Sugar: 15g
- Sodium: 30mg
- Fat: 7g
- Saturated Fat: 4g
- Unsaturated Fat: 2g
- Trans Fat: 0g
- Carbohydrates: 14g
- Fiber: 1g
- Protein: 1g
- Cholesterol: 7mg