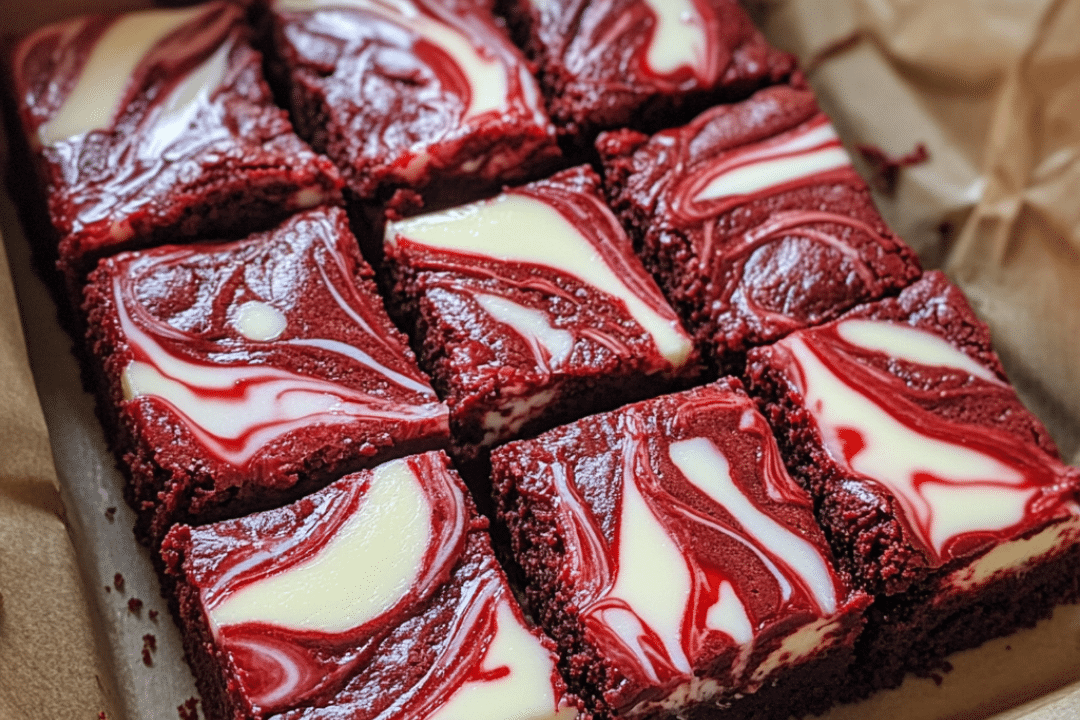
If you’re craving a dessert that combines the rich flavors of red velvet and the creamy indulgence of cheesecake, these Red Velvet Cheesecake Brownies are the perfect treat. The combination of soft, velvety red velvet cake and smooth, tangy cream cheese creates a delightful contrast that’s sure to satisfy your sweet tooth. These brownies are not only simple to make, but they also offer a beautiful, marbled effect that’s sure to impress at any gathering or celebration. Whether you’re making them for a holiday treat or simply to enjoy on a cozy evening, this dessert will definitely hit the spot.
This recipe takes the beloved red velvet cake and elevates it with a layer of cheesecake that creates a luxurious and indulgent treat. The ease of using a box of cake mix for the base makes the preparation quick, while the cream cheese topping adds a rich, velvety finish. With a prep time of just 15 minutes, these brownies come together in no time, yet they feel like a special occasion dessert. The combination of flavors and textures will make you want to keep this recipe on repeat.
Why You’ll Love This Recipe
These Red Velvet Cheesecake Brownies are an ideal dessert for any occasion. The red velvet cake mix creates a soft, moist brownie base, while the cheesecake swirl adds a rich, creamy contrast. The marbled effect not only looks stunning but also gives you the best of both worlds in each bite. Whether served at a party, holiday celebration, or as a treat to share with friends and family, these brownies are sure to become a favorite. Plus, they’re incredibly easy to make, so you can enjoy the delicious result with minimal effort.
Ingredients
- Red velvet cake mix
- Unsalted butter
- Eggs
- Cream cheese
- Granulated sugar
- Vanilla extract
Variations
- Add Chocolate Chips: For an extra touch of sweetness, consider adding some semi-sweet or white chocolate chips to the red velvet layer before baking.
- Top with Whipped Cream: Serve these brownies with a dollop of freshly whipped cream or a scoop of vanilla ice cream to make them even more indulgent.
- Make it Gluten-Free: You can use a gluten-free red velvet cake mix for a gluten-free version of these brownies without compromising on flavor.
- Add Nuts: For a crunchy texture, sprinkle some chopped nuts like pecans or walnuts on top before baking.
How to Make the Recipe
Step 1: Preheat the Oven and Prepare the Pan
Preheat the oven to 350°F (175°C). Line a 9×9 inch baking pan with parchment paper to prevent the brownies from sticking.
Step 2: Make the Red Velvet Layer
In a large bowl, combine the red velvet cake mix, melted butter, and one egg. Mix well until the ingredients are fully combined into a thick batter. Press the mixture evenly into the bottom of the prepared baking pan.
Step 3: Prepare the Cheesecake Layer
In a separate bowl, beat together the softened cream cheese, granulated sugar, one egg, and vanilla extract until smooth and creamy.
Step 4: Layer the Cream Cheese Mixture
Pour the cheesecake mixture over the red velvet layer in the baking pan, spreading it evenly.
Step 5: Create the Marbled Effect
Using a knife or a skewer, gently swirl the cream cheese mixture into the red velvet layer to create a marbled effect. Be careful not to overmix—just a few swirls will give you the perfect look.
Step 6: Bake
Place the pan in the preheated oven and bake for 25-30 minutes. The edges should be set, and the center should still have a slight jiggle when you gently shake the pan.
Step 7: Cool and Serve
Allow the brownies to cool completely in the pan. Once cooled, cut into squares and serve.
Tips for Making the Recipe
- Cream Cheese Consistency: Ensure the cream cheese is softened to room temperature for the smoothest texture when mixing.
- Don’t Overmix: When swirling the cheesecake mixture with the red velvet layer, a few gentle swirls are enough. Overmixing can cause the layers to blend too much, losing the marbled effect.
- Let It Cool: Allow the brownies to cool completely before cutting to avoid the layers from separating and to ensure the perfect texture.
How to Serve
These Red Velvet Cheesecake Brownies are delicious on their own but can also be served with a scoop of vanilla ice cream, a drizzle of chocolate or caramel sauce, or a dollop of whipped cream. For an extra touch, garnish with fresh berries or a sprinkle of powdered sugar for a festive look.
Make Ahead and Storage
Storing Leftovers
Store any leftover brownies in an airtight container at room temperature for up to 3 days. They can also be refrigerated for up to a week for longer freshness.
Freezing
You can freeze these brownies for up to 3 months. Allow them to cool completely, then cut them into squares and place them in a freezer-safe container or bag. When ready to serve, let them thaw at room temperature for a few hours.
Reheating
If you prefer warm brownies, simply microwave a square for 10-15 seconds or warm them in the oven at 300°F (150°C) for about 5-10 minutes.
FAQs
1. Can I use homemade red velvet cake batter instead of a mix?
Yes, you can substitute homemade red velvet cake batter for the box mix. Just ensure the batter is thick enough to hold the cheesecake layer.
2. Can I use low-fat cream cheese?
Yes, you can use low-fat cream cheese, but the texture and creaminess may be slightly different.
3. Can I add chocolate chips to the batter?
Yes, adding chocolate chips to the red velvet layer can give the brownies an extra burst of flavor.
4. How do I store leftover brownies?
Store leftover brownies in an airtight container at room temperature for up to 3 days or refrigerate them for a longer shelf life.
5. Can I make these brownies ahead of time?
Yes, you can make these brownies up to 2 days in advance. Store them in an airtight container and refrigerate them until ready to serve.
6. Can I freeze Red Velvet Cheesecake Brownies?
Yes, these brownies freeze well for up to 3 months. Be sure to let them cool completely before freezing.
7. Can I substitute the egg in the cheesecake layer?
Yes, you can use an egg substitute like flaxseed or a store-bought egg replacer if needed.
8. How do I know when the brownies are done baking?
The edges should be firm, and the center should still jiggle slightly when you shake the pan.
9. How should I serve the brownies?
Serve these brownies at room temperature, or warm them up for a gooey, indulgent treat.
10. Can I make these brownies gluten-free?
Yes, you can use a gluten-free red velvet cake mix to make these brownies gluten-free.
Conclusion
Red Velvet Cheesecake Brownies are a perfect dessert that combines the rich, vibrant flavor of red velvet cake with the smooth, creamy goodness of cheesecake. Easy to make and visually stunning, they’re perfect for any occasion. Whether you’re hosting a holiday gathering or simply want a decadent treat to enjoy at home, these brownies are sure to become a favorite. The marbled effect adds a touch of elegance, while the combination of flavors ensures every bite is pure bliss.
Print
Red Velvet Cheesecake Brownies
- Total Time: 40 minutes
- Yield: 12 servings 1x
Description
These indulgent Red Velvet Cheesecake Brownies combine the rich flavors of red velvet cake with a creamy cheesecake swirl. Perfect for any occasion, they’re a delicious and visually stunning treat.
Ingredients
- 1 box red velvet cake mix
- 1/2 cup unsalted butter, melted
- 1 large egg
- 1 package cream cheese, softened
- 1/4 cup granulated sugar
- 1 large egg
- 1 teaspoon vanilla extract
Instructions
- Preheat the oven to 350°F (175°C). Line a 9×9-inch baking pan with parchment paper.
- In a large bowl, combine the red velvet cake mix, melted butter, and egg. Mix until smooth and well combined.
- Press the cake mixture evenly into the bottom of the prepared pan.
- In another bowl, beat together the softened cream cheese, sugar, egg, and vanilla extract until smooth and creamy.
- Pour the cream cheese mixture over the red velvet layer in the baking pan.
- Use a knife to swirl the two mixtures together to create a marbled effect.
- Bake in the preheated oven for 25-30 minutes, or until the edges are set, and the center is slightly jiggly.
- Allow to cool completely before cutting into squares and serving.
Notes
- Let the brownies cool completely before cutting to ensure clean slices.
- For an extra touch, top with whipped cream or a drizzle of cream cheese frosting.
- Prep Time: 15 minutes
- Cook Time: 25 minutes

