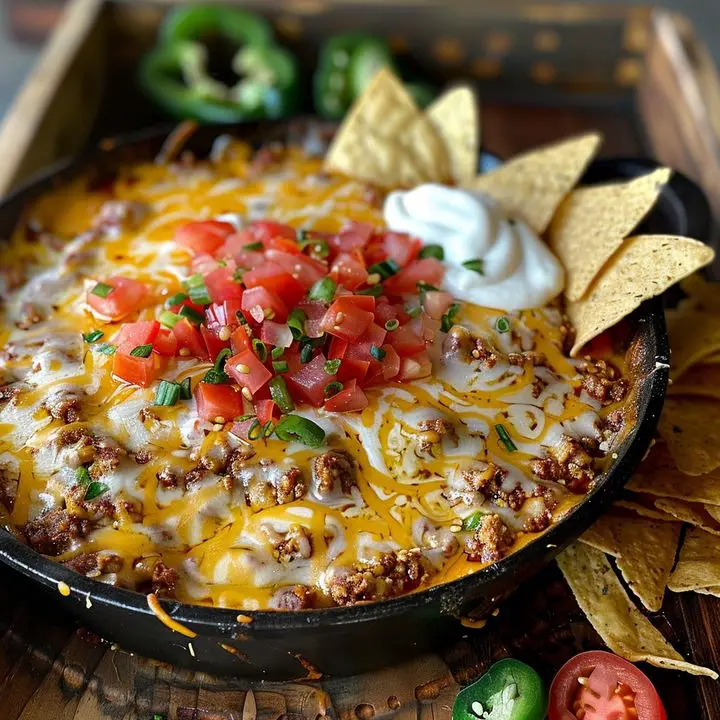
Dive into the irresistible layers of Texas Trash Dip, a flavorful and cheesy dish that’s perfect for parties, gatherings, or a cozy night in. This warm dip combines creamy, cheesy goodness with a kick of spice, making it an instant crowd-pleaser.
Ingredients
- 1 can (16 oz) refried beans
- 1 package (8 oz) cream cheese, softened
- 1 cup sour cream
- 1 package (1 oz) taco seasoning mix
- 1 can (4 oz) diced green chilies, undrained
- 1 cup salsa
- 2 cups shredded Mexican blend cheese
- 1 cup shredded Monterey Jack cheese
- 1 cup shredded cheddar cheese
- 2 green onions, chopped (optional)
- Fresh cilantro, chopped (optional)
- Tortilla chips, for serving
Directions
- Preheat the Oven: Preheat your oven to 350°F (175°C). Lightly grease a 9×13-inch baking dish.
- Mix Ingredients: In a large mixing bowl, combine the refried beans, cream cheese, sour cream, taco seasoning mix, diced green chilies, and salsa. Mix until well blended.
- Spread Mixture: Spread the bean mixture evenly into the prepared baking dish.
- Add Cheese: Sprinkle the shredded Mexican blend cheese, Monterey Jack cheese, and cheddar cheese evenly over the top of the bean mixture.
- Bake: Bake in the preheated oven for 25-30 minutes, or until the cheese is melted and bubbly.
- Cool and Garnish: Remove from the oven and let cool slightly. Sprinkle with chopped green onions and fresh cilantro, if desired.
- Serve: Serve warm with tortilla chips.
Servings and Timing
- Servings: 8-10
- Preparation Time: 10 minutes
- Cooking Time: 25-30 minutes
- Total Time: 35-40 minutes
Variations
- Spicy Version: Use hot salsa and add extra diced green chilies for a spicier dip.
- Meat Lover’s Dip: Add cooked ground beef or sausage to the bean mixture before baking for a heartier dish.
- Vegetarian Option: Ensure the taco seasoning mix and other ingredients are vegetarian-friendly if needed.
Storage/Reheating
- Storage: Store leftover dip in an airtight container in the refrigerator for up to 3 days.
- Reheating: Reheat in the microwave or oven until heated through. For best results, cover with foil when reheating in the oven to prevent the top from burning.
10 FAQs
- Can I use low-fat or fat-free cream cheese?
Yes, you can substitute low-fat or fat-free cream cheese, though it may slightly affect the creaminess. - Can I prepare this dip ahead of time?
Yes, you can assemble the dip a day ahead and bake just before serving. - Can I use a different type of cheese?
Feel free to substitute with your favorite cheese blends or add extra cheeses for a unique flavor. - How can I make this dip vegetarian?
Ensure the taco seasoning mix is vegetarian, and avoid any meat additions. - Can I freeze this dip?
It is not recommended to freeze the dip as the texture may change upon thawing and reheating. - What can I serve with this dip besides tortilla chips?
Serve with pita chips, vegetable sticks, or use as a filling for tacos and burritos. - How do I make this dip spicier?
Use hot salsa, add more diced green chilies, or include jalapeños for extra heat. - Can I make this dip in a slow cooker?
Yes, you can cook this dip in a slow cooker on low for 2-3 hours or until bubbly. - What if I don’t have a 9×13-inch baking dish?
You can use a similarly sized dish or adjust the baking time if using a different size. - Can I use homemade refried beans?
Yes, homemade refried beans work great in this recipe and add a personal touch.
Conclusion
Texas Trash Dip is a hearty, cheesy dip that’s perfect for any occasion, whether it’s a game day gathering or a casual get-together. With its creamy layers and rich flavors, this dip is sure to be a hit with family and friends. Easy to make and even easier to enjoy, it’s a guaranteed crowd-pleaser that will keep everyone coming back for more.
Print
Butterfinger Caramel Crunch Bars
- Total Time: 10 minutes
Description
These decadent bars feature a crunchy graham cracker crust topped with layers of Butterfinger candy, rich caramel, and creamy chocolate. An irresistible treat for any dessert lover!
Ingredients
- 1 cup crushed graham crackers
- 1/2 cup melted butter
- 1 cup chopped Butterfinger candy bars
- 1 cup caramel sauce
- 1 cup chocolate chips
- 1 cup sweetened condensed milk
Instructions
- In a mixing bowl, combine the crushed graham crackers and melted butter.
- Press the mixture into the bottom of a 9×13 inch baking pan to form a crust.
- Sprinkle the chopped Butterfinger candy bars over the crust.
- Drizzle the caramel sauce over the candy bars.
- In a small saucepan, melt the chocolate chips and sweetened condensed milk together over low heat, stirring until smooth.
- Pour the chocolate mixture over the caramel layer.
- Refrigerate for at least 2 hours before cutting into bars.
Notes
For added flavor, consider sprinkling a pinch of sea salt on top before refrigerating for a sweet-salty contrast.
- Prep Time: 10 minutes
- Cook Time: 0 minutes

