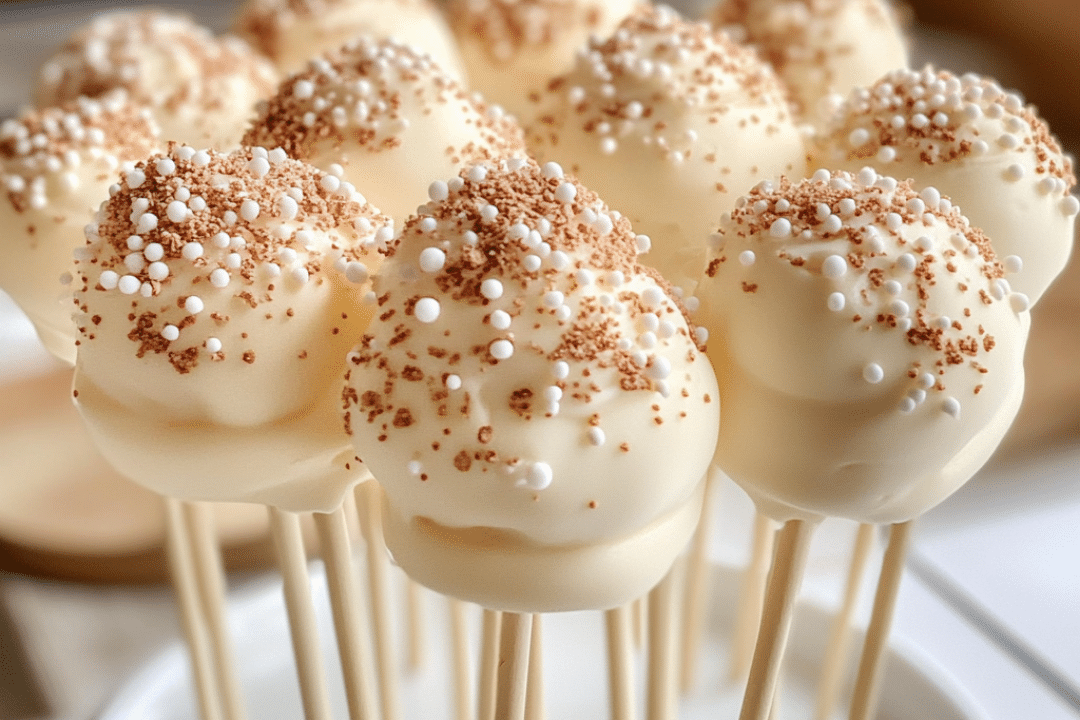
Cake pops have become a popular treat in recent years, and for good reason! They are fun, portable, and perfectly portioned. This Starbucks-inspired vanilla cake pop recipe brings the signature taste of the coffeehouse’s beloved treat straight to your kitchen. With a moist and fluffy vanilla cake base, smooth vanilla frosting, and a colorful candy melt coating, these cake pops are a delightful dessert that will surely satisfy your sweet tooth. They are perfect for parties, celebrations, or as a sweet snack to enjoy with your favorite coffee or tea. Easy to make, customizable, and visually stunning, these vanilla cake pops are the perfect homemade alternative to the store-bought version, and they might just become your new go-to dessert!
Why You’ll Love This Recipe
There’s a lot to love about these homemade vanilla cake pops. First, they’re incredibly easy to make, especially since they start with a box of classic vanilla cake mix. The moist, fluffy cake is perfectly complemented by a generous amount of creamy vanilla frosting, and the candy melt coating adds a fun pop of color. The white nonpareils give them a festive look that’s perfect for any occasion, from birthday parties to casual coffee breaks. They’re also a great make-ahead treat, so you can prepare them in advance and serve them when needed. Whether you’re a fan of cake pops from Starbucks or just looking to try your hand at making them yourself, this recipe is a surefire hit!
Ingredients
- Classic vanilla cake mix (1 box, such as Duncan Hines)
- Eggs (3, as required by the cake mix)
- Oil (1/3 cup, as required by the cake mix)
- Water (1 cup, as required by the cake mix)
- Vanilla frosting (1/4 cup, pre-made)
- Pink candy melts (12 oz)
- White sprinkles (nonpareils)
Variations
These cake pops are highly customizable, so feel free to get creative with the flavors and decorations:
- Different cake flavors: Swap out the vanilla cake mix for chocolate, red velvet, or any other cake flavor you love.
- Different coatings: While pink candy melts give a classic look, you can use any color of candy melts to suit the occasion, like white, blue, or even multi-colored for a fun twist.
- Add-ins: For added flavor and texture, you can mix in mini chocolate chips, crushed cookies, or even a dash of flavor extract, such as almond or mint, to the cake batter.
- Toppings: Instead of sprinkles, you can dip the cake pops in crushed nuts, coconut flakes, or colored sugars for a personalized touch.
How to Make the Recipe
Step 1: Bake the Cake
Start by preparing the cake mix according to the instructions on the box. Combine the eggs, oil, water, and cake mix in a bowl and mix until smooth. Pour the batter into a greased baking pan and bake according to the package directions (typically at 350°F for 25-30 minutes). Once baked, allow the cake to cool completely.
Step 2: Crumble the Cake
Once the cake has cooled, crumble it into small pieces using your hands or a fork. Continue until the entire cake is broken down into fine crumbs. Be sure to remove any large chunks that may interfere with the smooth texture of the cake pops.
Step 3: Add Frosting
Add 1/4 cup of pre-made vanilla frosting to the crumbled cake. Mix it together until the cake crumbs are well coated with frosting and the mixture holds together when you squeeze it. If the mixture is too dry, add a little more frosting until it reaches the right consistency.
Step 4: Form the Cake Balls
Take small amounts of the cake mixture and roll them into balls, about 1 inch in diameter. Place the formed cake balls onto a baking sheet lined with parchment paper.
Step 5: Melt the Candy Melts
In a microwave-safe bowl, melt the pink candy melts in 30-second intervals, stirring between each, until fully melted. If the candy melts are too thick, add 1-2 tablespoons of shortening to achieve a smooth consistency.
Step 6: Insert the Cake Pop Sticks
Dip the tip of each cake pop stick into the melted candy melt to coat it slightly. Then, insert the stick into the center of each cake ball. This helps the stick stay in place when the cake pops are dipped later.
Step 7: Dip the Cake Pops
Once all the cake balls have sticks inserted, dip each one into the melted pink candy melts, covering the entire cake ball. Allow any excess coating to drip off.
Step 8: Decorate with Sprinkles
Before the candy coating hardens, sprinkle the white nonpareils on top of the cake pops for a festive, fun look.
Step 9: Let the Cake Pops Set
Place the cake pops upright in a piece of foam or a stand to allow the coating to set. Let them cool for about 30 minutes to ensure the coating hardens completely.

Tips for Making the Recipe
- Cake consistency: Don’t add too much frosting; just enough to make the cake crumbs stick together. Too much frosting can make the cake pops overly sweet and soft.
- Smooth candy coating: Add a small amount of shortening to the candy melts if the consistency is too thick for easy dipping. This will help ensure a smooth, even coating.
- Chill the cake balls: If you have trouble with the cake balls falling apart when dipping, refrigerate them for 20-30 minutes before dipping to help them firm up.
- Color variation: Feel free to use different candy melt colors based on the occasion—red and pink for Valentine’s Day, pastels for spring, or any other color scheme you prefer.
How to Serve
Vanilla cake pops are perfect for:
- Parties: Serve them at birthday parties, baby showers, or holiday gatherings as a fun and easy-to-eat treat.
- Coffee breaks: Pair them with a warm cup of coffee or tea for a sweet afternoon snack.
- Gift-giving: Wrap them up in clear cellophane bags with ribbons for a thoughtful homemade gift.
- Dessert tables: Include them as part of a dessert spread at any celebration or event for a cute and colorful treat.
Make Ahead and Storage
Storing Leftovers
Once the cake pops are fully set, store them in an airtight container at room temperature for up to 1 week. To prevent the candy coating from getting damaged, you can place them on a tray or in a container with parchment paper between the layers.
Freezing
Cake pops freeze well and can be stored in an airtight container in the freezer for up to 3 months. To prevent the cake pops from sticking together, place them on a tray lined with wax paper and freeze them before transferring them into the container.
Reheating
Reheating cake pops is not necessary. If you froze them, allow them to thaw at room temperature for about 20-30 minutes before serving.

FAQs
1. Can I use homemade cake instead of a box mix?
Yes, you can substitute homemade cake for the box mix, but make sure the cake is fully cooled before crumbling it.
2. Can I use a different flavor of cake mix?
Absolutely! You can use chocolate cake mix, red velvet, or any other flavor that you prefer.
3. How do I prevent the cake pops from falling off the stick?
Make sure you dip the stick in the melted candy melts before inserting it into the cake ball to help secure it in place.
4. Can I make the cake pops smaller or larger?
Yes, you can adjust the size of the cake balls to your preference. Smaller cake pops are great for parties, while larger ones can be a more substantial treat.
5. Can I use different types of sprinkles?
Yes, you can use any type of sprinkles you like, including colored sugar, heart-shaped sprinkles, or even edible glitter for added decoration.
6. How long do I need to let the candy coating harden?
Allow the candy coating to set for about 30 minutes at room temperature, or place the cake pops in the refrigerator for about 10-15 minutes to speed up the process.
7. Can I make these cake pops ahead of time?
Yes, you can make the cake pops a day or two in advance and store them in an airtight container until you’re ready to serve them.
8. How do I avoid cracks in the candy coating?
Make sure the candy melts are fully melted and smooth. If the candy coating hardens too quickly, you can add a little shortening to make it more fluid.
9. Can I make the cake pops without frosting?
Frosting is what binds the cake crumbs together and gives the cake pops their texture, so it’s recommended to use it.
10. Can I dip the cake pops in chocolate instead of candy melts?
Yes, you can use chocolate chips or a chocolate coating, but be sure to temper the chocolate for a smooth finish.
Conclusion
These Starbucks-inspired vanilla cake pops are not only delicious but also fun to make. With a simple box of vanilla cake mix, frosting, and candy melts, you can create beautiful, festive treats that are perfect for any occasion. Whether you’re enjoying them as a sweet snack with coffee or gifting them to someone special, these cake pops are sure to impress.
Print
Vanilla Cake Pops (Starbucks Copycat) Recipe
- Total Time: 45 minutes
- Yield: 16 cake pops 1x
- Diet: Vegetarian
Description
These Vanilla Cake Pops are a homemade version of the Starbucks treat! Soft, moist vanilla cake is combined with creamy frosting, dipped in colorful pink candy melts, and topped with sprinkles, making them the perfect sweet bite for any occasion.
Ingredients
- 1 box classic vanilla cake mix (I used Duncan Hines)
- 3 eggs (as required by the cake mix – this can vary with different brands)
- ⅓ cup oil (as required by the cake mix – this can vary with different brands)
- 1 cup water (as required by the cake mix – this can vary with different brands)
- ¼ cup vanilla frosting (pre-made)
- 12 oz pink candy melts
- White sprinkles (nonpareils)
Instructions
- Preheat the oven and prepare the cake mix according to the instructions on the box (usually mixing the cake mix with eggs, oil, and water).
- Pour the batter into a greased or lined 9×13-inch baking pan and bake according to the package directions (usually 25-30 minutes).
- Once the cake is baked, allow it to cool completely.
- Crumble the cooled cake into a large bowl, breaking it up with your hands or a fork until it becomes fine crumbs.
- Add the vanilla frosting to the cake crumbs and mix well until the mixture sticks together when pressed.
- Roll the cake mixture into small, bite-sized balls (about 1-inch in diameter) and place them on a baking sheet lined with parchment paper.
- Melt the pink candy melts in the microwave in 20-30 second intervals, stirring between each, until smooth.
- Dip the end of a lollipop stick into the melted candy melts, then insert it into the center of each cake ball. This helps the stick stay in place.
- Dip each cake ball into the pink candy melts, covering it completely. Tap gently to remove any excess candy melts.
- While the candy coating is still soft, sprinkle with white nonpareil sprinkles.
- Allow the cake pops to cool completely and the coating to harden before serving.
Notes
- For a smoother candy coating, you can add a teaspoon of vegetable oil to the melted candy melts to thin them out.
- These cake pops can be stored in an airtight container for up to a week.
- Prep Time: 20 minutes
- Cook Time: 25 minutes
- Category: Dessert, Snack
- Method: Baking, Dipping
- Cuisine: American


